The holiday season is here, and it’s time to show your loved ones how much you care. A thoughtful gift is always appreciated, but the presentation can make all the difference.
Don’t settle for dull wrapping paper or generic gift bags – let your imagination run wild and make your present stand out from the crowd!
With our list of seven creative and innovative ways to wrap clothes, you can elevate the excitement and anticipation of opening a present to a whole new level. Each wrapping idea is designed to impress and delight your loved ones, from intricate folding techniques to playful embellishments.
So, whether you’re gifting a cozy sweater or a stylish scarf, get ready to add a touch of wow factor to your gift-giving experience. Your loved ones will surely appreciate the effort you put into making their gift even more special and memorable.
Let’s dive into these amazing wrapping ideas!
Table of Contents
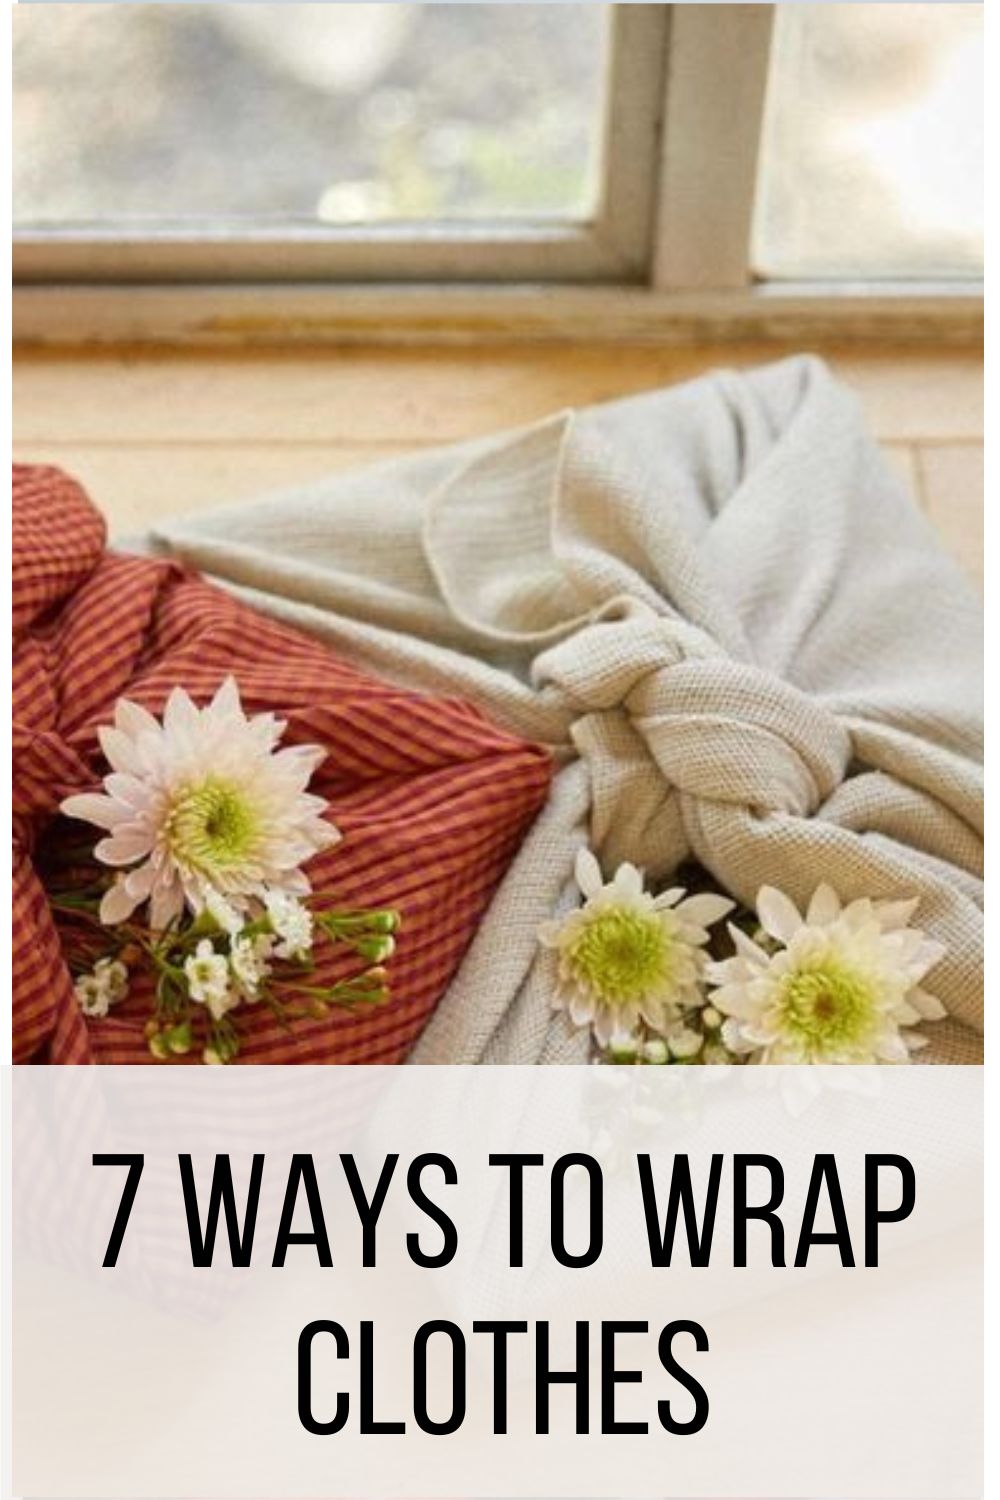
7 Innovative Ideas for Wrapping Clothes
With these seven ways to wrap clothes, you can bid farewell to the boring technique you have known all your life. So, let’s get started!
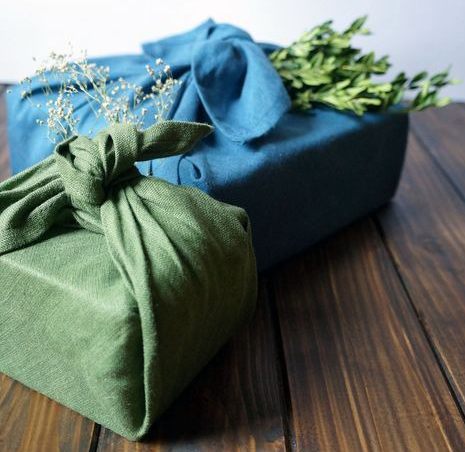
Furoshiki Wrapping
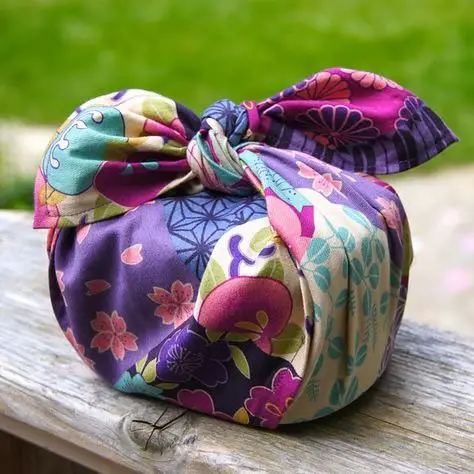
Furoshiki wrapping is a traditional Japanese art of wrapping items in cloth. It’s a beautiful and eco-friendly way to wrap clothes for gifts. It’s a perfect alternative to the usual wrapping papers that end up in landfills.
Here are the steps to follow to create this unique and elegant wrapping:
Step 1: Choose a Square Cloth
Furoshiki wrapping requires a square cloth that is large enough to wrap the clothes. You can use a traditional furoshiki cloth, a scarf, or any other fabric that suits your style.
Step 2: Place the Clothes in the Center of the Cloth
Lay the clothes flat in the center of the cloth, making sure that they are arranged neatly and centered.
Step 3: Bring Opposite Corners Together
Take the two opposite corners of the cloth and bring them together above the clothes.
Step 4: Tie a Knot
Tie a knot with the two corners, making sure it’s snug but not too tight.
Step 5: Bring the Other Two Corners Together
Take the remaining two opposite corners of the cloth and bring them together above the knot.
Step 6: Tie a Second Knot
Tie a second knot with these corners, securing the wrapping.
Step 7: Adjust the Wrapping
Adjust the cloth around the clothes, making sure it’s neat and symmetrical.
Step 8: Tie a Bow
Tie a bow with the remaining cloth, or use a ribbon or twine to add a decorative touch.
Furoshiki wrapping is not only elegant and unique, but it’s also reusable and eco-friendly. The recipient can reuse the cloth for other gifts, as a scarf, or even as decoration in their home. It’s a win-win situation!
So, the next time you’re looking for a creative and sustainable way to wrap your clothes, give Furoshiki wrapping a try. It’s sure to impress the receiver and make a positive impact on the environment.
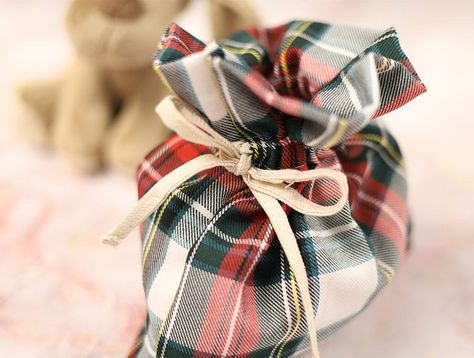
Fabric Envelope Wrapping
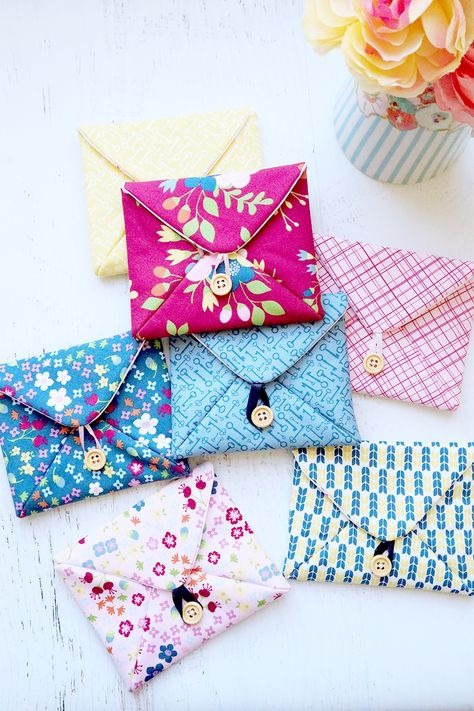
Using a fabric bag is one of the most imaginative and distinctive ways to wrap clothes. This is a great way to package your gift in a unique fashion, whether you decide to make the bag yourself or purchase one from a nearby shop.
Here are the steps for utilizing a cloth bag to wrap a gift:
Step 1: Get a Ready-Made Fabric Envelope or Stitch One
Get a fabric pouch or sew one. It’s possible that you’ll need to utilize more than one cloth pouch, depending on the garment you wish to wrap.
Step 2: Place the Clothes Inside
Once you have a fabric envelope tailored to the size of the article you are wrapping, the next step is to put the present inside. Make sure it fits snuggly.
Step 3: Tie a Ribbon
Now you have to tie a ribbon around the fabric envelope to ensure the article inside stays in position. Plus, adding a ribbon makes your gift look more presentable. Wrap it around the envelope and fasten it securely.
Step 4: Add Decorations (Optional)
Use a bow or knot to hold the ribbon in position. The pouch can be enhanced with extra embellishments like fabric blooms, frills, or sparkles to make it appear more festive.
A great approach to express your creativity and make your present stand out is to wrap it in a fabric pouch. Also, because cloth is reusable and creates no waste, it is an environmentally responsible choice.
Additionally, making your own pouch is a terrific way to practice your sewing skills and personalize your present. Whichever method you use to wrap your item, ensure it is tight, and the bow is tightly fastened.
Mason Jar Wrapping
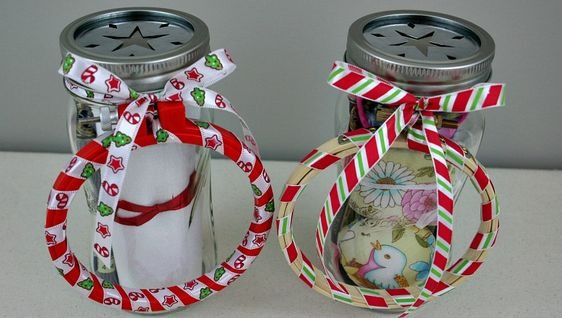
Mason jar wrapping is a creative and charming way of wrapping clothes for gifts. Not only is it simple and easy to do, but it also adds a rustic touch to your gift. Here’s a step-by-step guide to help you create this unique wrapping:
Step 1: Choose a Mason Jar
Pick a mason jar that is big enough to hold the clothes you want to wrap. You can use a clear jar or one with a colored tint, depending on your preference.
Step 2: Roll the Clothes
Carefully roll up the clothes you want to wrap and place them inside the mason jar. Make sure they fit snugly inside the jar and are arranged neatly.
Step 3: Decorate the Jar
Tie a ribbon or twine around the mouth of the jar to add a decorative touch. You can also attach a gift tag or a small ornament to the ribbon.
Step 4: Add Final Touches
Fill the jar with tissue paper or shredded paper to prevent the clothes from moving around inside the jar during transit. You can also add some small gifts or trinkets to the jar to make it even more special.
Mason jar wrapping is a versatile wrapping method that can be used for a variety of occasions, such as birthdays, Christmas, or even as a housewarming gift.
Not only is it a great way to present clothes, but the jar can also be reused by the recipient for storage or as a decorative piece in their home!
Upcycled Wrapping Paper
Upcycling is an eco-friendly way to reduce waste and a creative way to create personalized gift wrapping. You can use old newspapers, magazines, or even fabric scraps to create unique wrapping paper for your gifts.
Here are the steps to make upcycled wrapping paper:
Step 1: Choose the Material
The first step is to choose the material you want to use as wrapping paper. Old newspapers or magazines are great options as they are readily available, and you can easily find them in your house.
If you want to be more creative, you can also use fabric scraps, adding texture and dimension to your wrapping.
Step 2: Cut the Material to the Appropriate Size
Once you’ve chosen the material, the next step is to cut it to the appropriate size to wrap the clothes. Make sure to measure the clothes and add a few extra inches to ensure that the wrapping paper covers the gift entirely.
Step 3: Decorate the Wrapping Paper
Now comes the fun part! Use stickers, markers, or paint to create a unique design on the wrapping paper. You can also use stamps or stencils to create patterns or designs. Let your creativity run wild and make the wrapping paper personal to the recipient or the occasion.
Upcycled wrapping paper not only adds a personal touch to your gift, but it’s a great way to reuse materials that may have otherwise been thrown away. With these simple steps, you can create beautiful, one-of-a-kind wrapping paper that is sure to impress the recipient.
Scarf Wrapping
Scarves are versatile and stylish accessories that can be used to wrap gifts. Let’s show you how you can use a scarf to wrap clothes:
Step 1: Pick a Scarf
To create a scarf wrapping, the first step is to choose a scarf that is large enough to wrap the clothes. Make sure the scarf complements the clothes you are wrapping. You will also need ribbon or twine and scissors.
Step 2: Arrange Everything
Once you have your materials, lay the scarf flat on a table or any flat surface. Place the clothes in the scarf’s center, ensuring they are arranged neatly and centered.
Next, take the two opposite corners of the scarf and bring them together above the clothes. Tie a knot with the two corners, making sure it’s snug but not too tight.
Step 3: Wrap the Gift
Then, take the remaining two opposite corners of the scarf and bring them together above the knot. Tie a second knot with these corners, securing the wrapping.
Step 4: Adjust the Wrapping for a Neat Finish
After you have secured the wrapping with the knots, adjust the scarf around the clothes, making sure it’s neat and symmetrical. You can also tuck in any excess fabric to make it look more presentable.
To add a personal touch, you can tie a bow or knot with the remaining fabric or use ribbon or twine to add a decorative touch. You can also add a personalized tag with the recipient’s name or a special message to make the gift more personal.
Layered Tissue Paper Wrapping
When it comes to gift wrapping, adding layers of tissue paper is an easy way to add a touch of creativity and fun to your presentation. The process is simple and requires only a few materials to create an eye-catching design to make your gift stand out.

Step 1: Choose Tissue Paper in Different Colors or Patterns
The first step is to choose tissue paper in a variety of colors or patterns that complement each other. Once you have your selection, begin layering them on top of each other, alternating colors or patterns as you go.
The number of layers you use will depend on the size of your gift, but three to five layers is usually a good starting point.
Step 2: Layer the Tissue Paper on Top of Each Other
Once you have your layers set, place your clothes in the center of the tissue paper. Gather the edges of the tissue paper together and twist them to form a “stem” at the top of the clothes. This will create a bunched effect around the gift, adding texture and depth to the wrapping.
Step 3: Secure the Wrapping
Finally, tie the twisted tissue paper together with ribbon or twine to secure the wrapping. You can choose a color that matches the tissue paper or opt for a contrasting color to add an extra
pop of color to your design.
With just a few simple steps, you can create a layered tissue paper wrapping that is both beautiful and functional. Your gift recipient will love the added touch of creativity and thoughtfulness that went into their presentation.
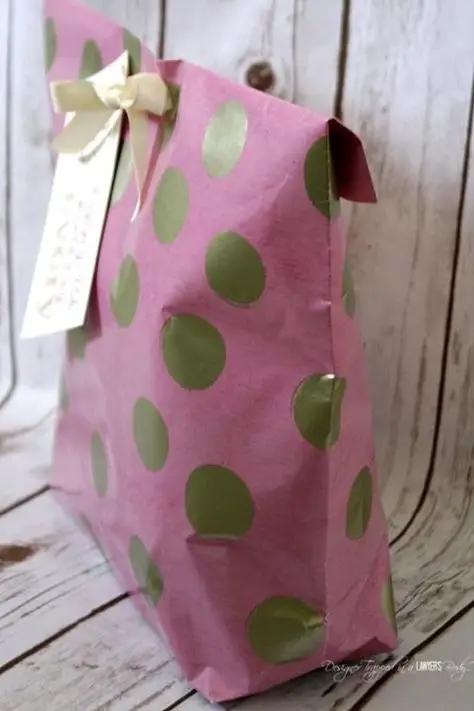
Personalized Gift Bag
Personalized gift bags are an easy and creative way to add a unique touch to your gift-giving. You can make a plain gift bag look unique and special by following a few simple steps.
Step 1: Choose the Gift Bag or Make One
To get started, choose a plain gift bag or make your own using craft paper or a cardboard box.
Step 2: Pick a Theme
Next, decide on a theme or design for the bag that will reflect the recipient’s taste and personality. You can use their favorite colors, interests, or even their name as inspiration.
Step 3: Decorate the Bag with Markers, Ribbons, or Stickers
Once you have a theme in mind, gather your decorating supplies. Use markers, stickers, ribbons, or photographs to add decorations to the bag. You can even create your own designs using stencils or freehand drawing.
Step 4: Add the Recipient’s Name or a Personalized Message
After you have decorated the bag, add a personalized message or the recipient’s name to make the gift feel even more special. This could be done using markers, stickers, or even by printing out a personalized label.
Final Words
Wrapping clothes can be just as fun and creative as finding the perfect gift. With these seven unique ways to wrap clothes, you can make your gift stand out and show the recipient how much you care.
Whether you opt for a personalized gift bag or upcycled wrapping paper, there’s a wrapping method to suit everyone’s style and personality.
So, tell us which one of these methods you will be trying out the next time you have a clothing item to gift to see how it elevates the experience for both you and the recipient. We look forward to reading your comments below!