
Distressing t-shirts is a popular DIY fashion trend that gives brand new shirts a vintage, worn-in look. Distressed or destroyed t-shirts have become a staple in many people’s wardrobes for their laidback, edgy style. The great thing about distressing your own t-shirts is that you can fully customize the look to your liking.
In this complete guide, you’ll learn multiple techniques for intentionally damaging t-shirts to create that perfectly imperfect distressed effect. From using scissors and razor blades, to trying out bleach distressing methods, we’ll cover various ways to make your plain tee look like it’s been through the ringer. Read on to transform basic t-shirts into urban streetwear with raw, rugged character.
Table of Contents
What You Need To Distress A T-Shirt
Distressing a t-shirt is an easy DIY project that doesn’t require many supplies. Here are some basic materials you’ll need:
T-Shirt
Choose a basic cotton t-shirt free of any embellishments. Stay away from moisture-wicking performance fabrics as they don’t distress as well. Opt for cheaper tees since the distressing process may ruin the shirt.
Sharp Scissors
Invest in a sturdy pair of sharp scissors to help cut clean slits or slices in the fabric. Dull scissors can fray or tear uneven edges.
Single or Double-Edged Razor Blades
Use disposable razor blades to create precise distressed effects like small slashes or fraying. Handle carefully!
Sandpaper (Optional)
Sandpaper in various grits can rub away fabric to mimic natural wearing. Try using 220 or 320 grit.
Bleach (Optional)
Household bleach can bleach out patches of color for varied fading effects. Use caution when handling.
Tweezers (Optional)
Tweezers help pluck out individual threads for a more meticulous fraying effect.
Cutting Mat or Cardboard (Optional)
Place shirts on a protected surface like a self-healing cutting mat or cardboard when using razor blades.
Rubber Bands, Clips, Clamps (Optional)
Bind shirt sections when bleach distressing to create unique patterns.
Salt (Optional)
Table salt sprinkled on bleach areas speeds up bleaching chemical reaction.
Spray Bottle with Water (Optional)
Lightly spritzing bleach areas help spread bleach more evenly.
How To Distress A T-Shirt With Scissors
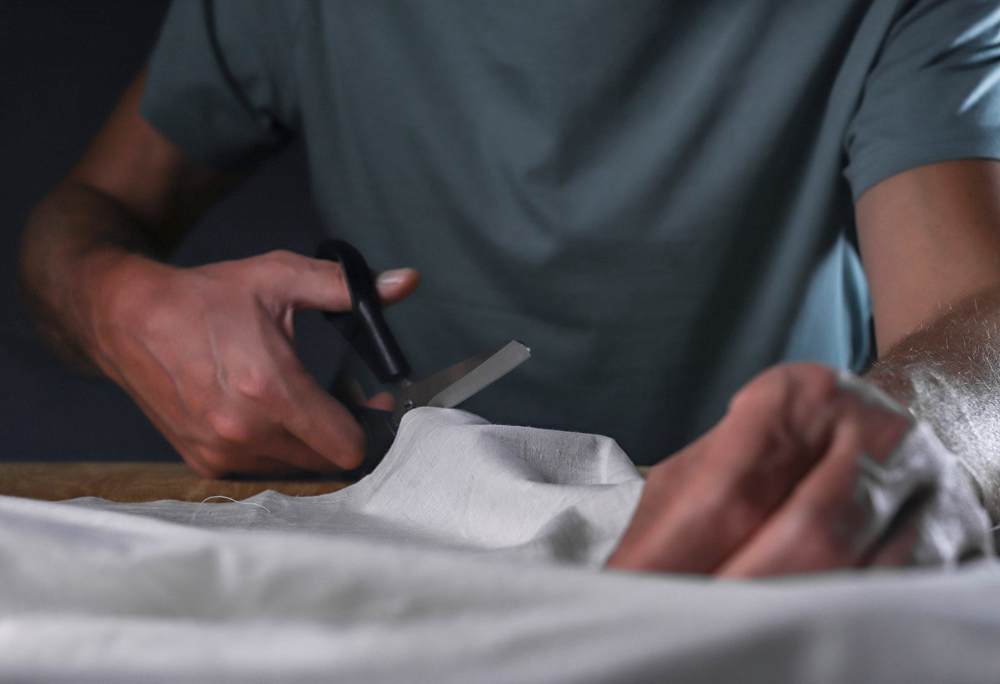
One of the easiest ways to distress a t-shirt is by simply cutting into the fabric with scissors. This method gives you lots of control over the size, shape, and quantity of distressed effects.
Steps
- Lay the t-shirt flat on a smooth work surface. Insert a piece of cardboard inside to prevent cutting through both sides.
- Determine the areas you want to distress like the neckline, sleeves, and hem. Also decide if you want small scattered slits or large jagged rips.
- Using sharp scissors, begin cutting small snips or larger slashes in the fabric. Cut diagonally for angled slashes.
- Optionally, roughly cut the sleeves or bottom hem for a chopped look. For the neckline, make rounded cuts to mimic stretched out elastic.
- Once slashes are cut, gently pull on the edges inward and outward so they curl and fray more.
- For extra fraying, use tweezers or needle-nose pliers to pluck out individual threads around the cut edges.
- Repeat the cutting and fraying process in different areas until you achieve your desired level of distressing.
- When finished, carefully remove any loose threads or pieces of cut fabric caught in the distressing slits.
Tips
- Focus distressing mostly on the edges and hem areas rather than the middle which can compromise the shirt’s structure.
- Try using pinking shears that cut a zigzag pattern to help prevent extensive unraveling.
- Be careful not to cut too much in one area as that may cause holes or tears.
- Wash and dry the shirt before wearing to soften the edges of any cuts.
How To Distress A T-Shirt With A Razor

Razor blades provide surgical precision for creating perfectly imperfect distressed effects on t-shirts. From small slits to frayed holes, razors offer intricate control.
Steps
- Insert a piece of cardboard inside the t-shirt and lay flat on a protected surface like a self-healing cutting mat.
- Plan out the pattern and size of cuts, keeping them on the smaller side. Mark guidelines lightly in pencil if desired.
- Using a new double-edge razor blade, carefully slice into the fabric following your planned lines and shapes. Apply minimal pressure, letting the sharp blade do the work.
- For a fraying effect, make a series of small parallel cuts or a dotted line of tiny slits.
- Try using the razor tip to delicately pick and tear individual threads around the cuts.
- For larger ragged holes, use the razor edge to cut out pieces of fabric. Opt for irregular shapes.
- Gently stretch the areas around the cuts inward and outward to encourage curling frayed edges.
- Make varying lengths of slashes on the neckline and sleeves for a stretched out appearance.
- Repeat making small precision slices and fraying holes across different areas of the shirt to build layered distressing.
- Check for any loose dangling threads and carefully cut them off. Wash and dry the shirt before wearing.
Tips
- Always slice away from yourself and work on a protected surface for safety.
- Apply less pressure for cleaner cuts in the fabric rather than tearing through rapidly.
- Avoid over-distressing one concentrated spot which can weaken the shirt’s integrity.
- For the most worn look, blend various techniques like cuts, frays, holes, and thread plucking.
How To Distress A T-Shirt With Sandpaper
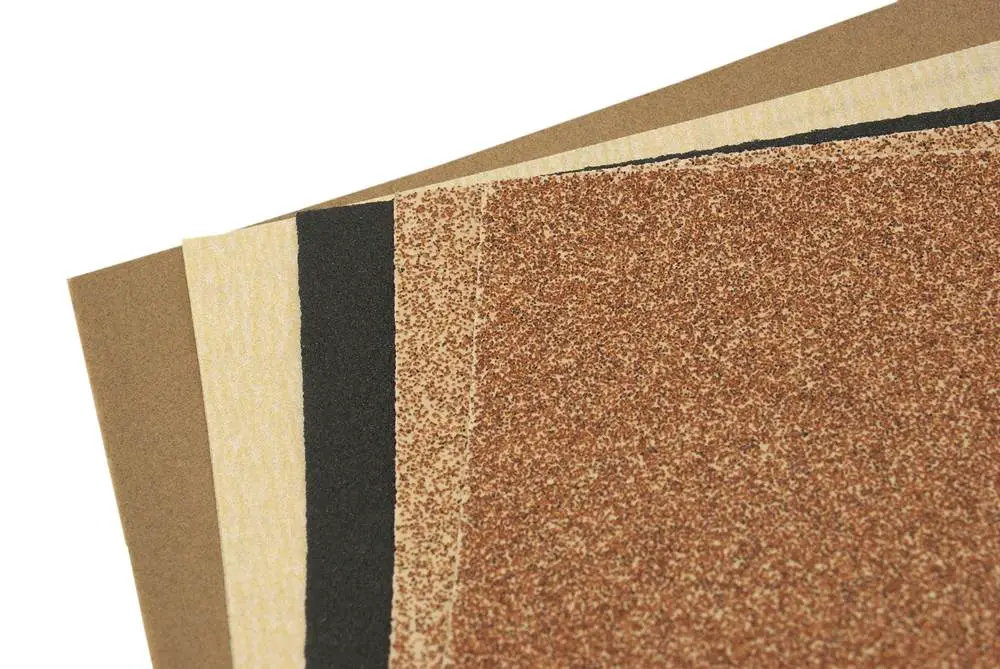
Rubbing sandpaper across t-shirt fabric removes fibers to mimic a well-worn appearance. It creates thinning effects, forming translucent holes that grow bigger the more it’s abraded.
Steps
- Slide a piece of cardboard inside the t-shirt laid flat to provide resistance while sanding.
- Use medium 220 or 320 grit sandpaper for distressing fabric. Higher grits remove less fabric.
- Focus abrasion on small areas first like the neckband, sleeve hems and side seams. Rub back and forth perpendicular to the fabric threads.
- Check frequently to judge the amount of thinning and holes forming. Apply more pressure and sanding to increase wear patterns.
- Concentrate distressing on worn spot effects by vigorously rubbing circular motions on specific spots.
- For an uneven faded effect, sand in sweeping motions across portions of the front/back avoiding other areas.
- Optionally, combine sanding with strategically placed bleached splotches for varied fading.
- When satisfied with the thinning and hole effects, wash and dry the shirt to soften any frayed edges.
Tips
- Fold over any sections you don’t want sanded to keep protected.
- Try heavier distressing on areas that get more wear like hems and collars.
- Be cautious around print designs which can get removed by abrasion.
- For extra texture, sand directionally with the fabric threads then against.
How To Distress A T-Shirt With Bleach
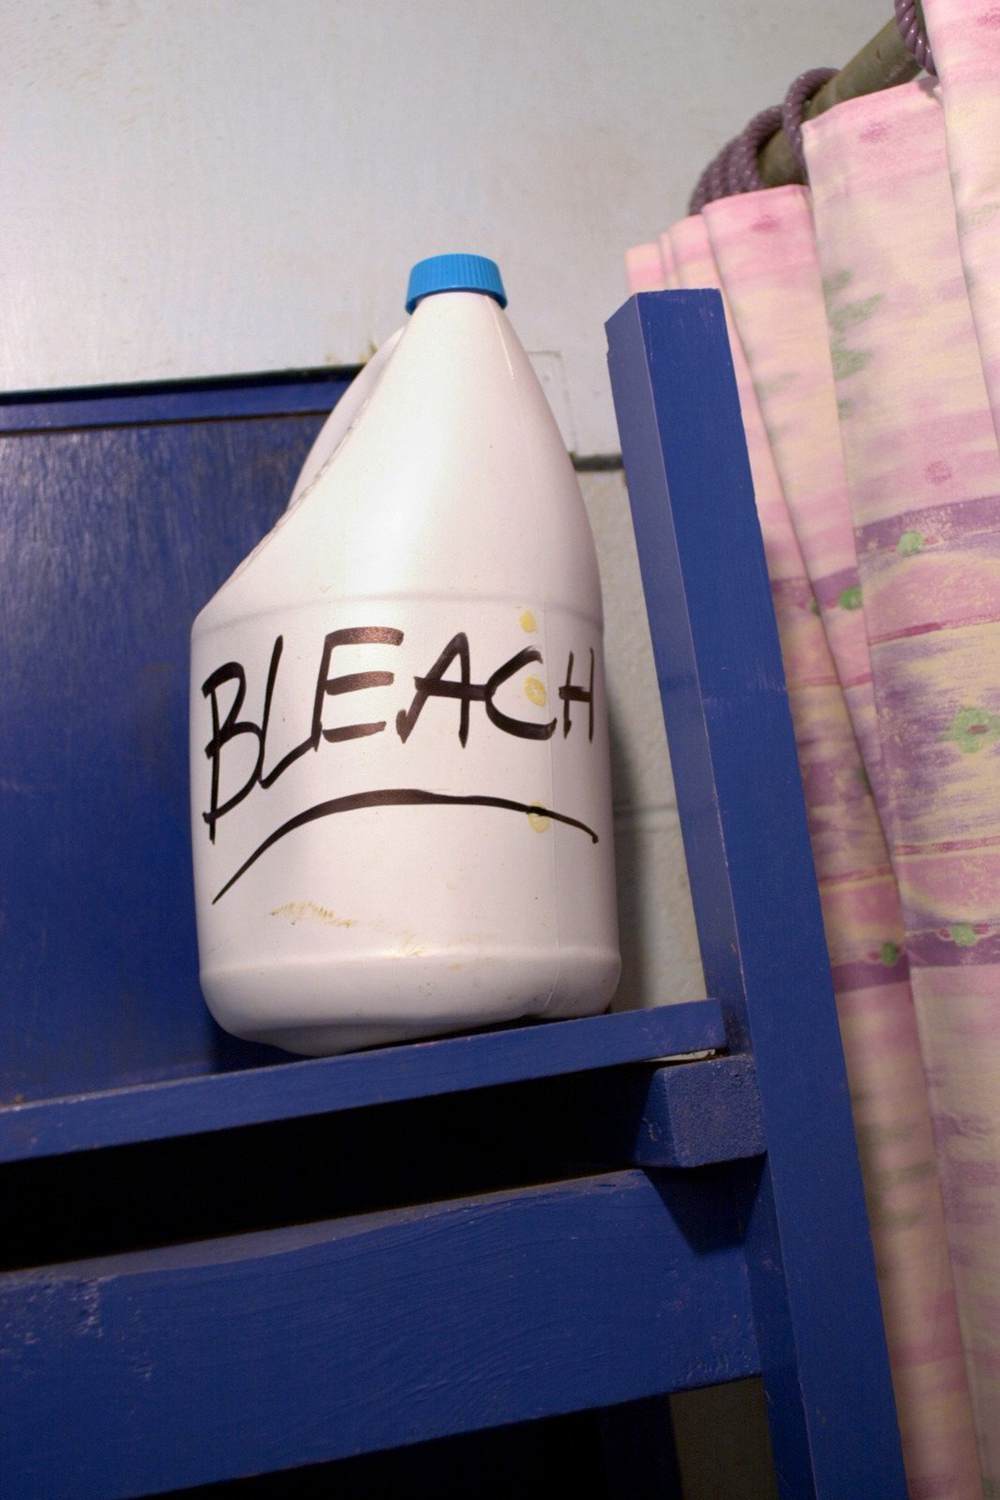
Bleaching is a chemical distressing method that removes color for cool faded effects. You can use bleach to create random splotches or unique patterns by tightly binding or twisting shirt sections.
Steps
- Wearing gloves, mix a 50/50 bleach and water solution in a spray bottle. Use full strength bleach for maximum color removal.
- Slide cardboard inside the t-shirt. Lay flat or bunch up areas you want selectively bleached.
- Mist bleach solution lightly over the front and back focusing on edges and side seams.
- For splotchy patterns, quickly spritz bleach randomly over the shirt. Let set 2-3 minutes.
- For camo or animal print effects, tightly wrap rubber bands, hair ties or clips around bunched up areas then bleach.
- For ombre fading, heavily saturate bleach on the bottom and gradually decrease drenching toward the top.
- Optionally, sprinkle salt on bleached sections and respray with water to accelerate chemical reaction.
- Allow to set for 10-15 minutes maximum before thoroughly rinsing out bleach. Wash and dry shirt before wearing.
Tips
- Test bleach first on a shirt scrap to check color removal time.
- Avoid over-bleaching as it can weaken fibers causing holes to develop.
- For extra fading, wash shirt several times after bleaching.
- Use a higher cotton content shirt for best bleach distressing results.
How To Add Stains To A Distressed T-Shirt
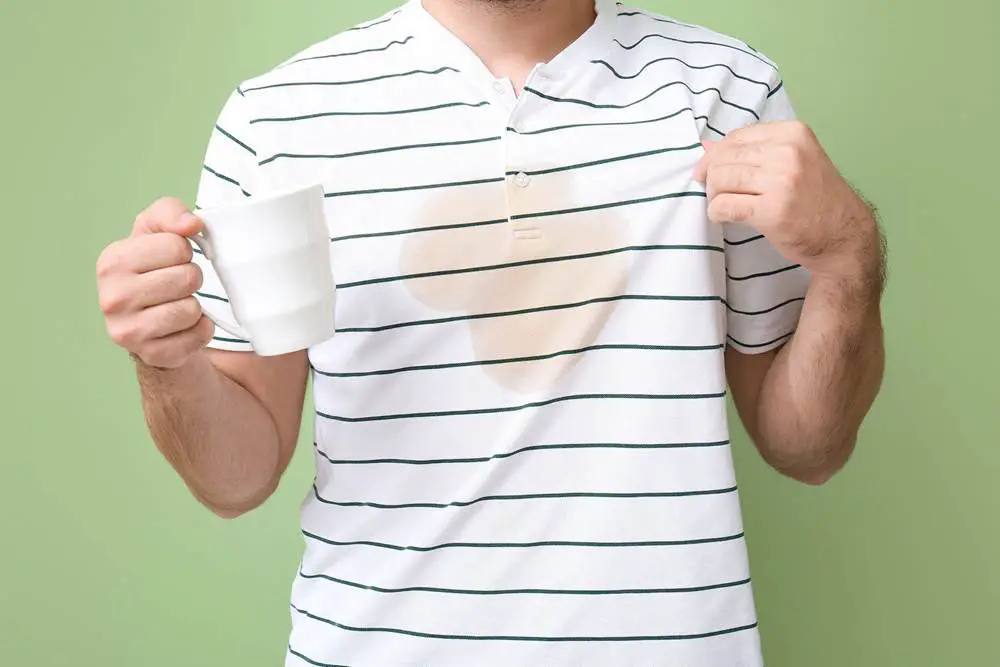
Adding stains is an optional finishing touch that can make a distressed tee look authentically well-worn and grungy. Here are some stain options:
- Paint: Smear white, black, or colored craft paint randomly across the shirt. Let dry.
- Dye/Ink: Dip edges in fabric dye or dab with permanent markers for a tie-dye appearance.
- Coffee/Tea: Splatter diluted coffee or tea for realistic staining.
- Oil/Grease: Use cooking oil or petroleum jelly to create translucent grease stains.
- Dirt: Apply dark eyeshadow or powdered cocoa mix dissolved in water for soiled effects.
Focus staining on areas that would get dirty like hems, sleeves, and neckline. Layer and blend different stain colors and allow to set before wearing.
Distressed T-Shirt Styling Tips
- Layer over a tank or long sleeve tee for an edgy peekaboo distressed effect.
- Tie up your chopped and frayed shirt hem for a cropped DIY look.
- Pair with destroyed denim for a coordinating grunge outfit.
- For women, dress up with a distressed tee, leather jacket and dark skinny jeans.
- For men, wear with black jeans and boots for casual urban streetstyle.
Common Questions
What are the best t-shirts to distress?
100% cotton t-shirts work best, preferably cheaper plain tees. Avoid performance fabrics with spandex or polyester that don’t fray well.
How do you prevent scissor cuts from unraveling too much?
Use sharp pinking shears that cut a zigzag pattern to help minimize excessive fraying. Be conservative when cutting to avoid large holes.
What can be used instead of sandpaper?
A metal wire brush, fine grit emery cloth, or metal scouring pad (like for washing dishes) can also abrade and wear holes in the fabric.
How do you bleach tie-dye a t-shirt?
Twist up small sections of the dry t-shirt and tightly secure with rubber bands before bleaching for cool tie-dye patterns. Rinse out bleach thoroughly when done.
Should distressed t-shirts be washed before wearing?
Yes, machine wash and dry the t-shirt at least once after distressing. This helps soften fabric fibers and prevent cuts or frays from unraveling further with wear.
Summary
Distressing t-shirts at home is an easy, fun craft that allows you to reinvent basic tees with edgy destroyed details. Using simple supplies like scissors, razor blades, sandpaper and bleach, you can create shirts that look naturally worn-in. Customize your own unique distressed effects from precise cuts to faded patterns. With a few easy techniques, you can transform plain t-shirts into urban streetwear staples with raw, grunge charm.